Weddio Theme Documentation
An overview of the WEDDIO WordPress theme along with usage instructions.
An overview of the WEDDIO WordPress theme along with usage instructions.
We at gethtmlcoder. are confident that you’ll be delighted with various features and clean, minimal design.
For any support please don't hesitate to contact us at info@baseonesolutions.com.
Hope you’ll enjoy using "Weddio" as much as we enjoyed developing it.
Before beginning the installation and configuring of your new theme, you must first have WordPress already installed on a server. Here is a very detailed guide at wordpress.org that will walk you through every step.
Go to ThemeForest Downloads and next to Weddio, click the Download button. There’re two options to download Weddio: All files documentation or Installable WordPress file only.
If you select the Installable WordPress file only option, the downloaded archive is the theme archive file you need to upload to your website.
If you select All files and documentation, you will need to extract the downloaded file on your computer. Inside the folder you will find another archive called weddio.zip. This is the theme archive file you need to upload.
Login to your WordPress admin panel and navigate to Appearance → Themes.
Click Add New Theme button at the top of the page, then the Upload Theme button on the next page.
Select the theme archive file on your computer and click Install Now.
Once the file is uploaded and installed, click Activate.
To manually upload your new WordPress theme, Use an FTP such as FileZilla and go to your WordPress installation director. Then Upload the un-zipped "weddio" WordPress Theme folder into the: wp-content/themes folder.
Once uploaded, activate the theme by heading to the Appearance → Themes menu in the WordPress Dashboard.
Follow these steps after you activated Weddio:
You may also install plugins by simply clicking the Begin Installing Plugins link in the notification message that appears after theme activation.
The Elementor Website Builder has it all: drag and drop page builder, pixel perfect design, mobile responsive editing, and more.
For detailed information and support on this plugin, please go to: Elementor
Build better sites in WordPress fast!
For detailed information and support on this plugin, please go to: Redux Framework
CMB2 will create metaboxes and forms with custom fields that will blow your mind.
For detailed information and support on this plugin, please go to: CMB2
Contact Form 7 is one of the most popular form builders for wordpress.
For detailed information and support on this plugin, please go to: Contact Form 7
Import your content, widgets and theme settings with one click.
For detailed information, please go to: One Click Demo Import
Mailchimp adds various highly effective sign-up methods to your site.
For detailed information, please go to: MC4WP: Mailchimp for WordPress
Display beautifully clean, customizable, and responsive Instagram feeds.
For detailed information, please go to: Smash Balloon Instagram Feed
This plugin it's designed for Weddio Theme.
To import demo data, please follow some steps below:
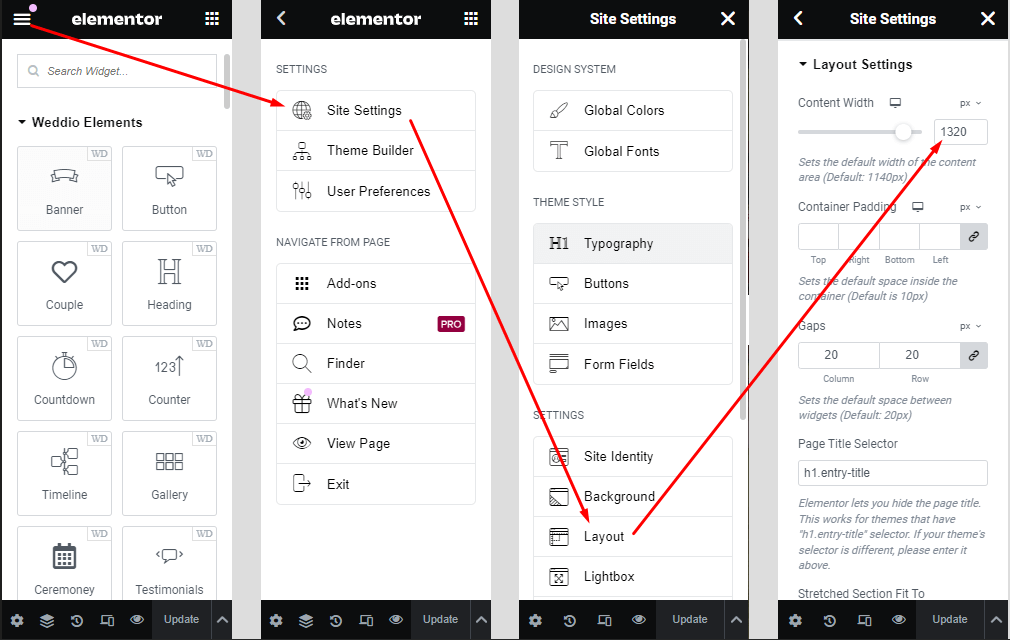
To change content width, please follow some steps below:
After the import you may uninstall the One Click Demo Import plugin.
To create Any Page, please follow some steps below:
To create Blog Page, please follow some steps below:
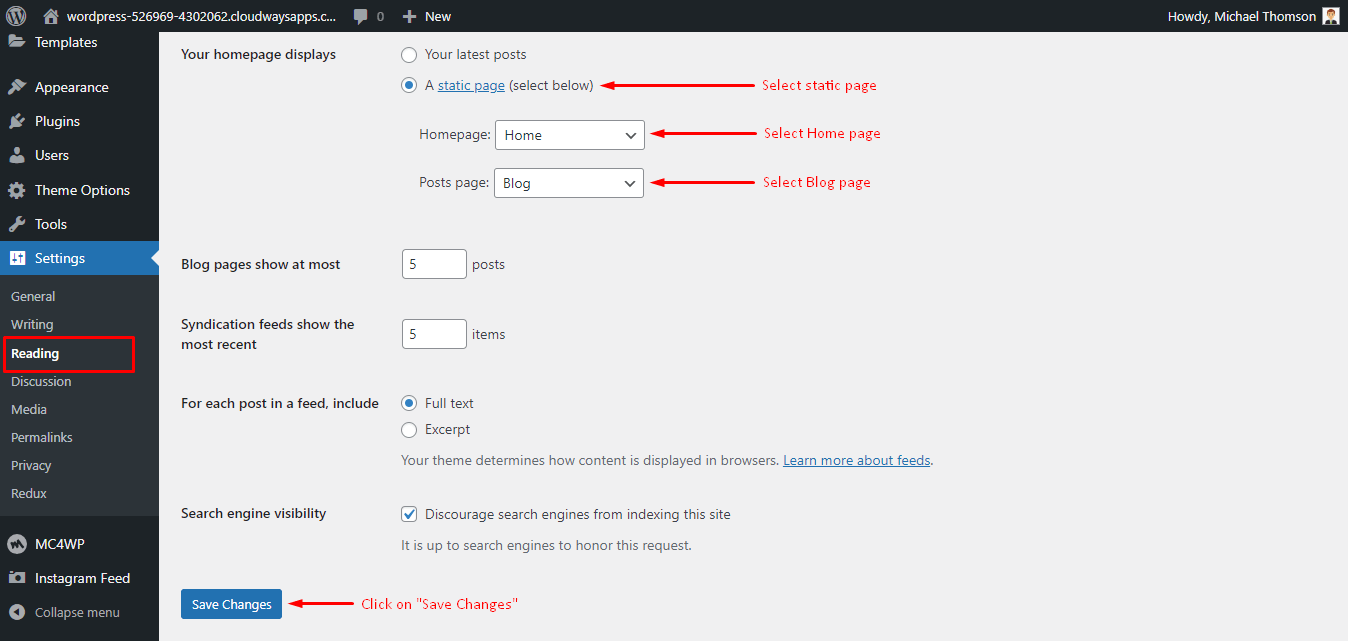
To set the home and blog page, login to wp-admin and go to Dashboard → Settings → Reading. and follow the following steps:
Through the Page Settings, you are able to make individualized changes on a per page basis. Page Settings will override any corresponding global options set in the Theme Options.
When creating a page, You will see Header Transparent, Banner Image and Page Footer under Page Settings at the bottom of the page editor while in the Weddio.
All global settings can be found in Dashboard → Theme Options. In addition, you can customize:
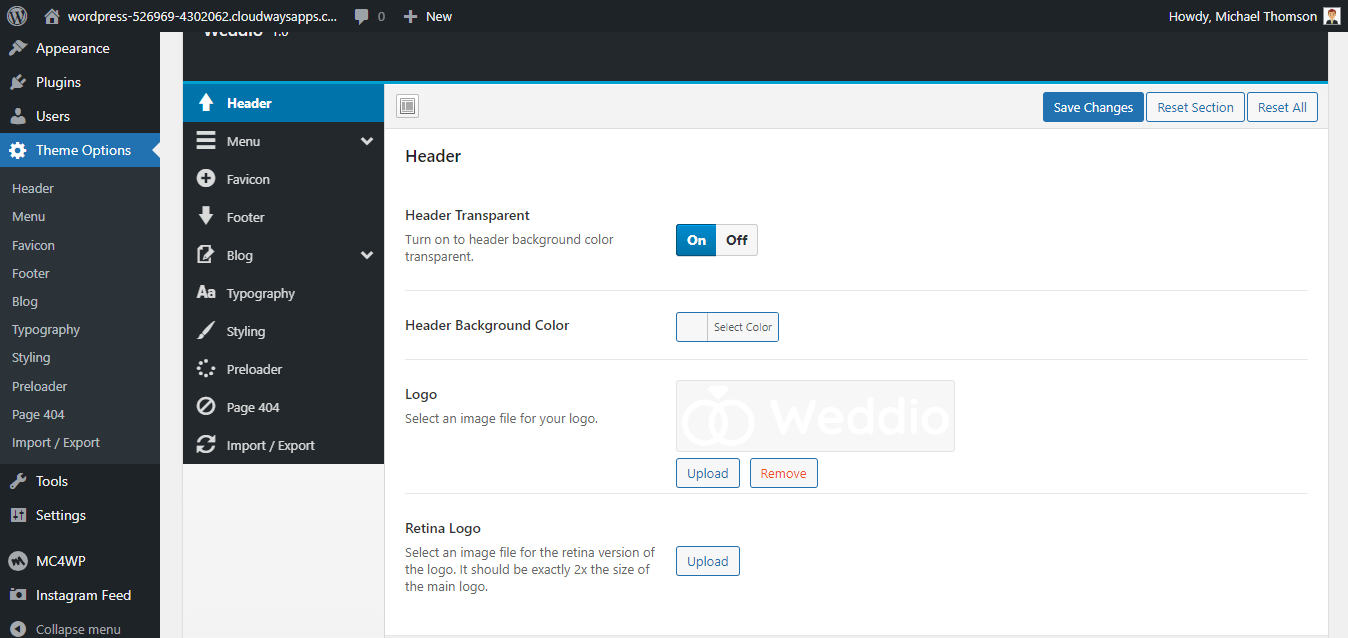
To change Theme Options Header navigate to Dashboard → Theme Options → Header and follow the following steps:
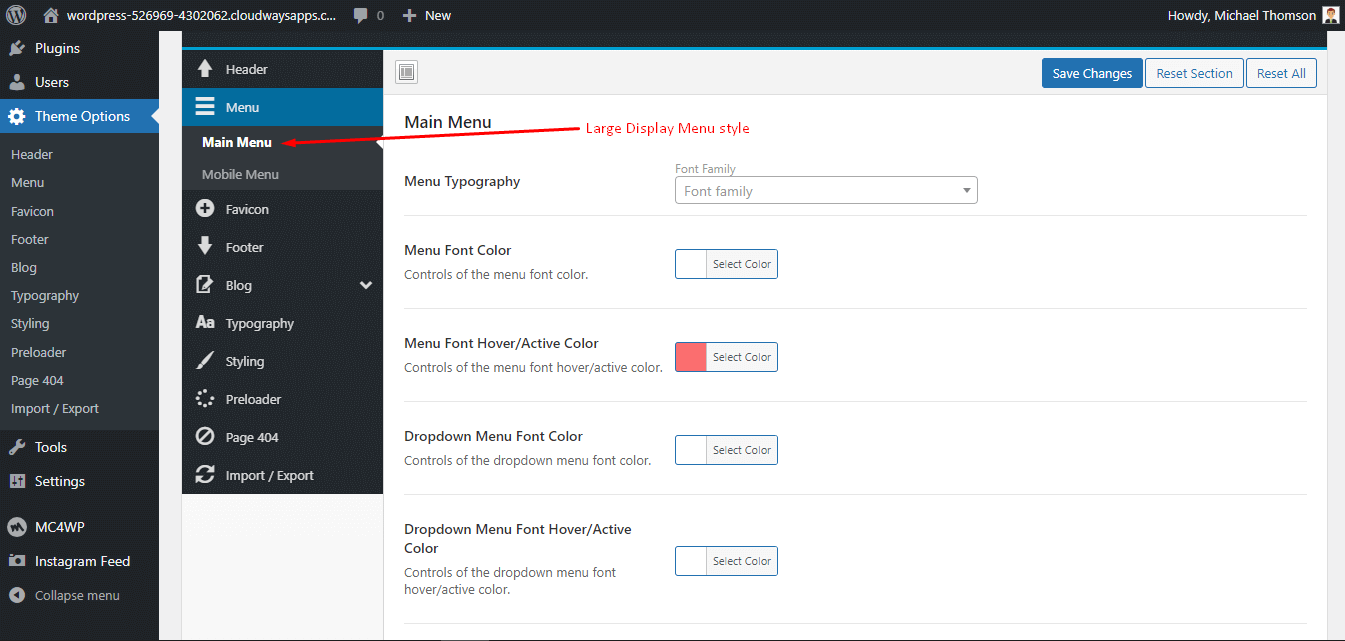
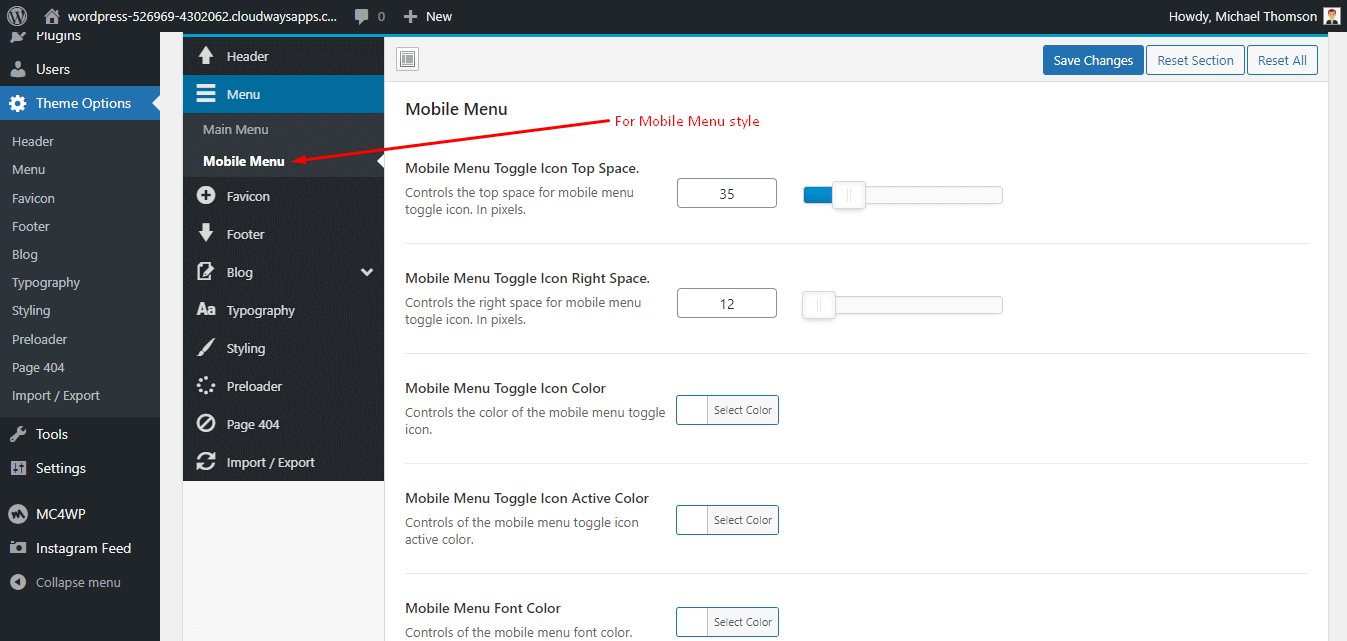
To change Theme Options Menu and Mobile Menu style navigate to Dashboard → Theme Options → Menu and follow the following steps:
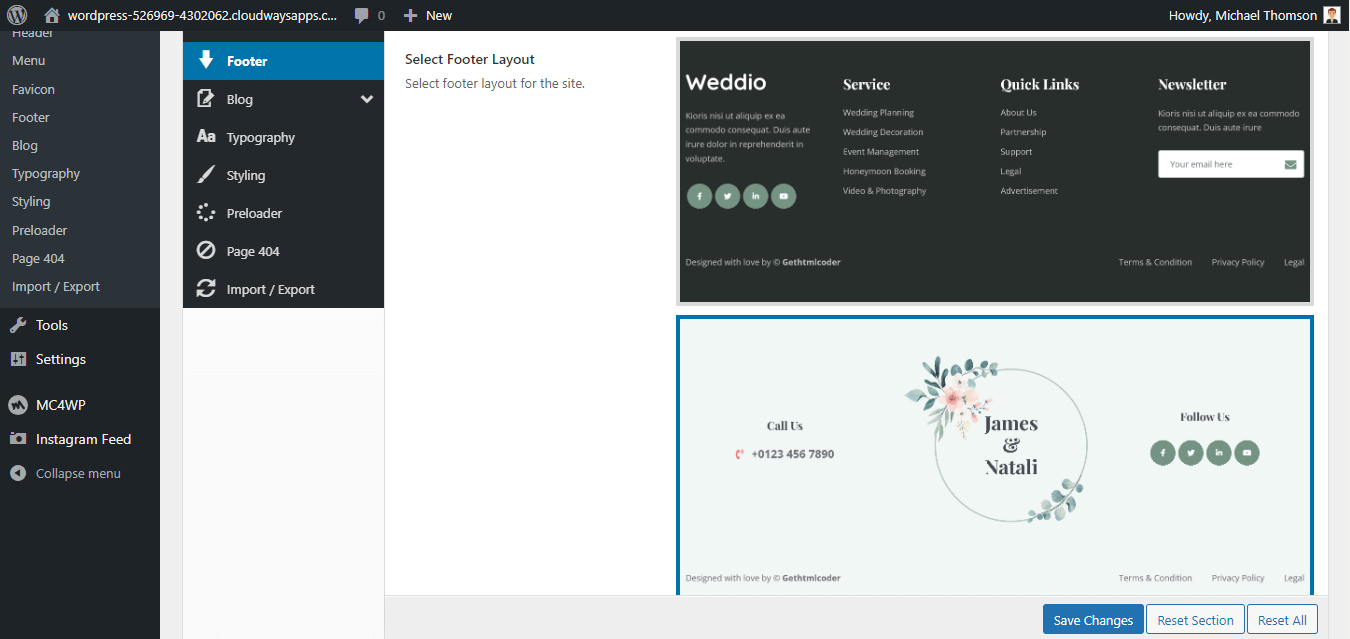
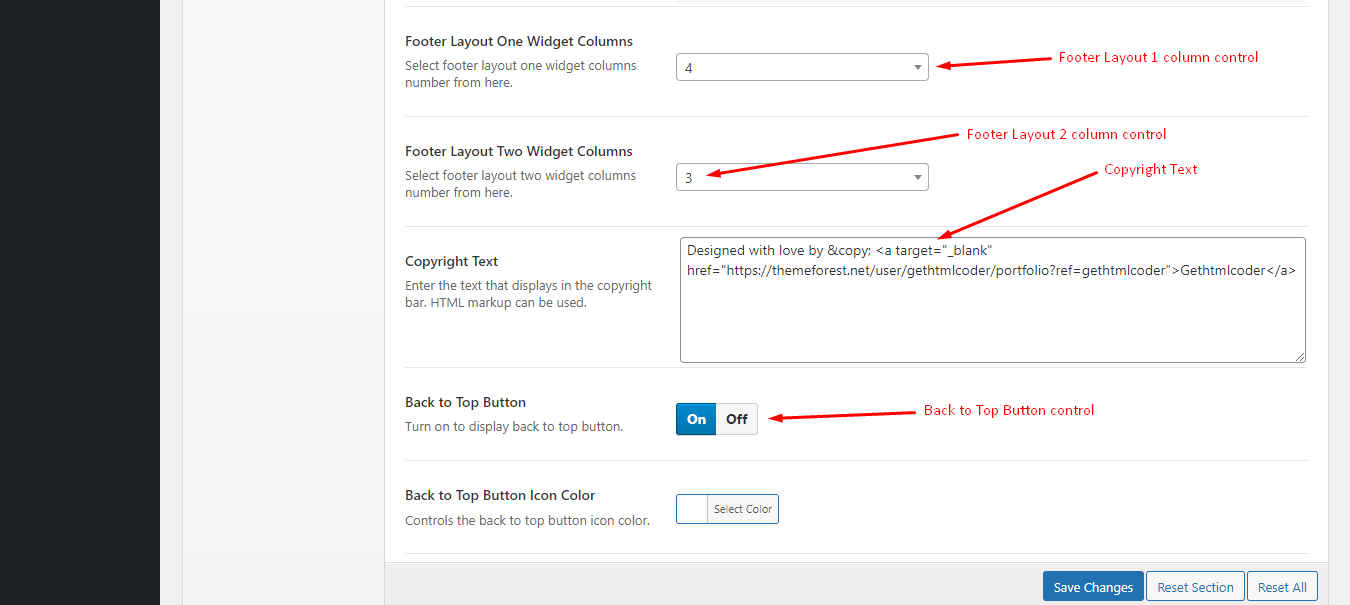
To change Theme Options Footer navigate to Dashboard → Theme Options → Footer and follow the following steps:
To change Theme Options Blog Page navigate to Dashboard → Theme Options → Blog.
To change Theme Options Blog Single navigate to Dashboard → Theme Options → Blog → Blog Single Post.
If you don’t want to import Demo Data, it’s fine too. To create Contact Form, please follow some steps below:
1. Go to Dashboard → Contact → Contact Forms → Contact form 1.
2. In the tab Form, enter this code lines:
                                    <div class="d-flex flex-wrap form-col form-three-col">
                                    <div class="form-group">
                                        [text* text-412 class:form-control placeholder "Your name"]
                                    </div>
                                    <div class="form-group">
                                        [email* email-779 class:form-control placeholder "Your email"]
                                    </div>
                                    <div class="form-group">
                                        [tel* tel-188 class:form-control placeholder "Your phone"]
                                    </div>
                                    </div>
                                    <div class="form-group">
                                        [textarea textarea-693 class:form-control placeholder "Your message here"]
                                    </div>
                                    <div class="submit-col">
                                        [submit "Submit Message"]
                                    </div>
3. In the tab Mail, enter this your email address.
4. Click Save and that is all.
Note: Refer to the Contact Form 7 documentation for more details on how to configure your contact forms.
If you don’t want to import Demo Data, it’s fine too. To create Book Now Form, please follow some steps below:
1. Go to Dashboard → Contact → Add New and set Form Title.
2. In the tab Form, enter this code lines:
                                    <div class="d-flex flex-wrap form-col">
                                    <div class="form-group">
                                        [text* text-802 class:form-control placeholder "Your name"]
                                    </div>
                                    <div class="form-group">
                                        [email* email-256 class:form-control placeholder "Your email"]
                                    </div>
                                    </div>
                                    <div class="d-flex flex-wrap form-col">
                                    <div class="form-group">
                                        [text* text-548 class:form-control placeholder "Number of guest"]
                                    </div>
                                    <div class="form-group">
                                        [select menu-131 class:form-select "Where you attend?" "Location 1" "Location 2" "Location 3"]
                                    </div>
                                    </div>
                                    <div class="form-group">
                                        [textarea textarea-944 class:form-control placeholder "Your note"]
                                    </div>
                                    <div class="submit-col">
                                        [submit "Book Now"]
                                    </div>
3. In the tab Mail, enter this your email address.
4. Click Save and that is all.
Note: Refer to the Contact Form 7 documentation for more details on how to configure your contact forms.
First, you have need to connect with Mailchimp through API (Get your API key here).
If you imported demo data, Go to Dashboard → MC4WP → Form, then click Save Changes and that is all.
Also, If you don’t want to import Demo Data, it’s fine too. To create Mailchimp Form, please follow some steps below:
1. Go to Dashboard → MC4WP → Form.
2. Click on Add new form.
3. Under the tab Fields in the field Form code, enter this code lines:
                                    <input class="form-control" type="email" required="" name="EMAIL" placeholder="Your email here">
                                    <input type="submit" value="">
                                    <button type="submit" value="Submit">
                                    <span>Subscribe Now</span>
                                    <i class="fas fa-envelope"></i>
                                    </button>
4. Click Save Changes and that is all.
Note: Refer to the mailchimp documentation for more details on how to connect your mailchimp account via API.
** Before updating please make sure to keep a backup of your installed theme and plugins to be on safe side.
You can use this plugin to keep the backup: https://wordpress.org/plugins/wp-theme-plugin-download/
There are few ways to update WordPress theme. You can follow any of the methods described below:
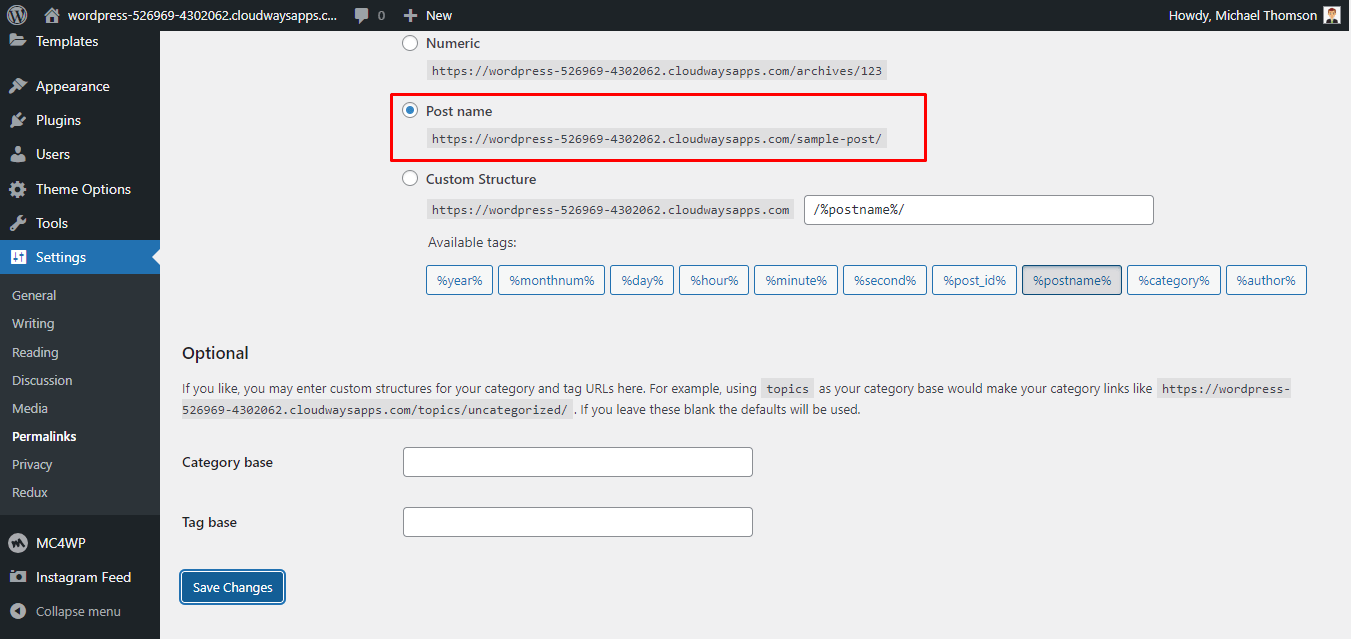
If you face this type of issue, please update your permalink. To update permalink, navigate to Settings → Permalink and then click on Save Changes button.
If you need any help or support please contact us through the Support Email: info@baseonesolutions.com.